What Are Wheel Center Cap Bolts and How Do They Work?
Wheel Center Cap Bolts are small fasteners that hold a wheel’s center cap securely in place. They may appear simple, but their design affects fit, appearance, and long-term reliability. The center cap covers the wheel hub opening and often carries a brand emblem or decorative finish. In some wheel designs, the cap also helps protect nearby components from dust, moisture, and road debris.
Not every cap uses bolts. Some use clips.
When bolts are used, they usually pass through the cap and thread into a mounting ring, adapter, or hub-related component. Tightening the bolt creates clamping force, which keeps the cap seated against the wheel. The correct thread size, bolt length, washer design, and tightening torque all matter. A bolt that is too long may contact internal parts, while excessive torque can crack a plastic cap or damage its finish.
From practical wheel maintenance, the safest approach is careful inspection before replacement. Check for stripped threads, missing washers, corrosion, and uneven seating around the cap. The wheel manufacturer’s specifications should guide installation because similar-looking bolts may not be interchangeable. This detail is easy to overlook. A loose cap can rattle against the wheel, while an over-tightened fastener may fail later without obvious warning.
This article explains how Wheel Center Cap Bolts work, where they fit, and why proper installation matters. It also addresses common mistakes, although real-world wheel designs vary more than many basic guides suggest. When uncertainty remains, verify the part number and consult a qualified wheel professional.
Definition and Purpose of Wheel Center Cap Bolts
What Are Wheel Center Cap Bolts and How Do They Work?
Wheel center cap bolts are small fasteners that secure a center cap to the middle of a wheel. The cap covers the hub area and creates a cleaner, finished appearance. It can also help shield the hub from loose dirt, water, and road debris. Small parts matter.
These bolts usually pass through mounting holes in the cap and thread into the wheel, an adapter, or a retaining plate. When tightened correctly, they hold the cap firmly against the wheel face. The bolt head may be visible, recessed, or covered by a decorative insert. Fit matters. The correct thread size, length, and seating style are essential.
A practical inspection should include the bolt threads, cap holes, and contact surfaces. Look for cross-threading, stripped threads, corrosion, or a cap that sits unevenly. Do not judge security by appearance alone. A bolt can look tight while applying little clamping force. Over-tightening can crack a cap or damage the wheel’s threads. Under-tightening may allow vibration and rattling.
Use the wheel maker’s specified torque whenever available. If no specification exists, careful measurement and professional advice are safer than guessing. This is one area where a quick replacement can create a poor fit. A small washer or different bolt may seem helpful, but it can change how pressure spreads across the cap. Recheck the fasteners after installation, especially if the vehicle has experienced strong vibration or rough roads.
Main Parts and Design Features of Center Cap Bolts
Wheel center cap bolts are small fasteners that hold a center cap against the wheel’s hub opening. They are usually separate from the main wheel lug nuts. Their job is mainly retention, alignment, and appearance. A correctly fitted bolt keeps the cap from rattling when the vehicle travels over uneven pavement.
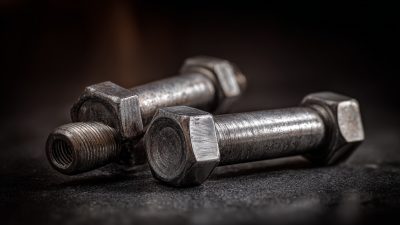
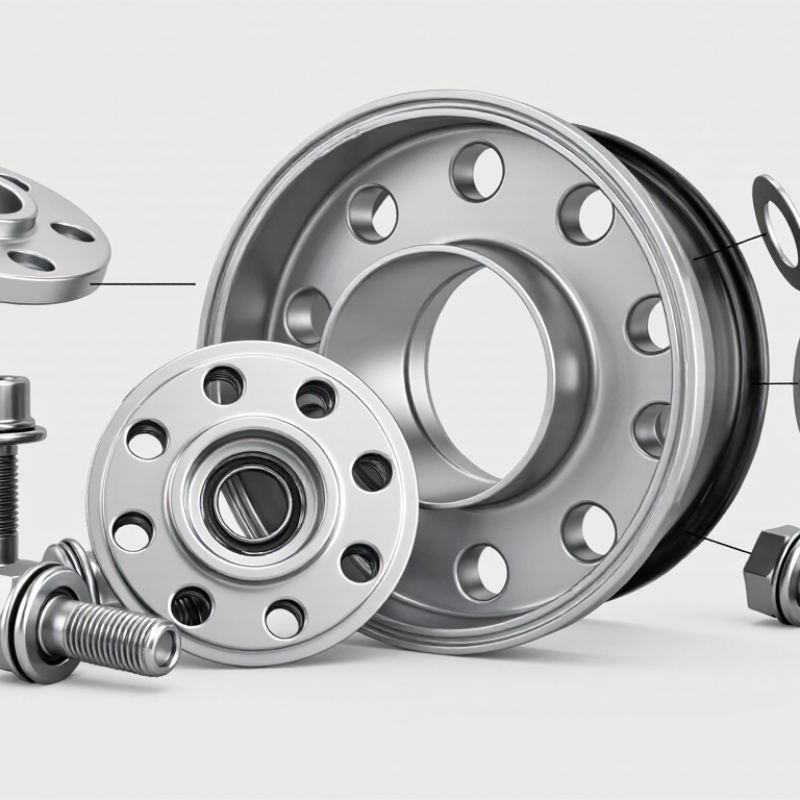
The main parts include the bolt head, threaded shaft, shoulder, and seating surface. The head may use a hex, socket, or star-shaped drive. This shape helps a tool apply controlled force in a narrow space. The threaded shaft matches the cap or wheel insert. Some designs include a shoulder, which limits tightening depth and protects the cap from crushing. A washer or molded flange can spread pressure around the mounting hole.
Material choice matters. Coated steel offers strength, while stainless alloys can improve corrosion resistance. However, “rust resistant” does not mean rust proof. Road salt, trapped moisture, and damaged coatings still create problems. The cap should sit evenly before tightening. Cross-threading is easy with small bolts. I have seen a bolt feel secure while the cap remained slightly loose. That small gap allowed dirt to collect behind it. Hand-start each bolt, check the thread condition, and use the specified torque. Excessive force may crack plastic, distort the cap, or damage the wheel insert. Inspect the fastener after cleaning, especially when the head shows rounding or surface corrosion.
How Wheel Center Cap Bolts Secure the Center Cap
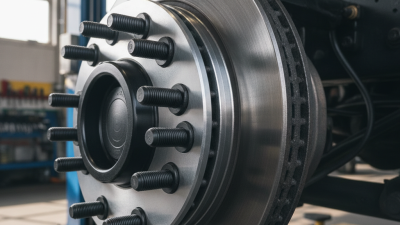
Wheel center cap bolts hold the cap against the wheel’s center opening. They usually pass through small holes in the cap’s mounting flange. The bolts then enter threaded holes, captive nuts, or separate retainers behind the wheel. Tightening creates clamping force. That force keeps the cap seated while the wheel rotates and experiences road vibration.
Correct alignment matters. The cap should sit evenly before the bolts are tightened. If one bolt is tightened too early, the cap may tilt or develop stress around its hole. Lightly threading every bolt first helps distribute pressure. A suitable torque setting is important. Excessive force can crack an alloy cap or strip a shallow thread. Too little force may allow movement, rattling, or eventual bolt loss.
Some bolts are functional, while others only provide a decorative appearance. Never assume every visible bolt carries the same load. During inspection, check for damaged threads, missing washers, corrosion, and marks around the cap edge. A loose cap often leaves faint circular rub marks. I have seen people blame the wheel when the real problem was an uneven cap surface. That mistake is easy to make. Clean contact areas before installation, but avoid heavy grease on the threads unless the service instructions permit it. Lubrication can change the final clamping force. Recheck the fasteners after initial driving, because new hardware can settle slightly.
What Are Wheel Center Cap Bolts and How Do They Work?
How Wheel Center Cap Bolts Secure the Center Cap
Center cap bolts hold the cap against the wheel by creating clamping force. As tightening torque increases, bolt preload generally increases, helping resist vibration and keeping the cap seated. The values below are engineering estimates for a 6 mm steel bolt using the relationship F = T ÷ (K × d), with a typical friction factor of K = 0.20.
Actual tightening requirements vary with bolt size, thread condition, lubrication, washer design, and wheel construction. Always follow the wheel or vehicle manufacturer’s specified torque.
Common Types and Materials Used in Center Cap Bolts
What Are Wheel Center Cap Bolts and How Do They Work?
Wheel center cap bolts are small fasteners that hold a center cap against the wheel hub opening. They mainly secure the cap, not the wheel itself. During installation, the bolt passes through the cap and enters a threaded insert or matching hole. Tightening creates clamping force, which keeps the cap from rattling, shifting, or falling away while driving.
Common Types and Fitment
Common types include:
- hex-head
- socket-head
- button-head
- concealed rear-mount bolts
Hex-head bolts are easy to adjust with a regular wrench. Socket-head designs fit into tight spaces and leave a cleaner appearance. Button-head bolts provide a rounded, visible surface. Some center caps use locking bolts, which require a special key and discourage casual removal. Thread size and length must match the cap and wheel insert precisely. A bolt that is too long may touch internal components.
Material and Corrosion Resistance
Material affects strength, appearance, and corrosion resistance.
Zinc-plated steel is affordable and handles ordinary road exposure.
Stainless steel resists rust better, especially where moisture and road salt are common.
Aluminum bolts are lightweight and visually clean, but they may have lower thread strength.
Titanium offers excellent strength-to-weight performance, though its cost is difficult to justify for many vehicles.
Practical Inspection
A practical inspection should check damaged threads, loose caps, and white corrosion around the bolt head. Use the specified torque rather than relying on hand strength. I once considered “tighter” safer, but that approach can distort a cap or damage soft threads. Clean contact surfaces matter too. Small details often decide whether the cap stays secure.
Inspection, Installation, and Replacement Guidelines
Wheel center cap bolts secure the decorative cap at the wheel’s center. They are not the main fasteners holding the wheel to the hub. A loose bolt can cause rattling, movement, or a missing cap during driving.
During inspection, park on level ground and let the wheel cool. Check each bolt for rust, bent threads, damaged heads, and missing washers. Press the cap gently to detect movement. In practical inspections, dirt often hides thread damage. Clean the area with a suitable brush, but avoid forcing debris deeper into the threads. A quick visual check is not enough. I have sometimes underestimated small corrosion marks, especially around exposed bolt heads.
For installation, confirm the correct thread diameter, pitch, length, and head style. Support the cap evenly, then start every bolt by hand. This helps prevent cross-threading. Tighten bolts gradually in a diagonal pattern when several bolts are used. Apply the specified torque from the wheel or vehicle service instructions. Do not guess. Excessive force may crack the cap or strip the threads. If a torque wrench is unavailable, postpone final tightening rather than relying on feel. That is inconvenient, but safer.
Replace bolts with damaged threads, rounded heads, severe corrosion, or incorrect length. Do not substitute random hardware from a general fastener drawer. Different materials can react and corrode. After installation, drive slowly for a short distance and recheck the cap for movement or unusual noise. Reinspection is easy to skip. It should not be.