Leave Your Message

How to Choose the Right Wheel Bolts in 2026?

Choosing the right Wheel Bolts in 2026 requires more than matching a shiny finish. The correct bolt must fit the wheel, hub, brake assembly, and vehicle load demands. A small thread error can damage a hub or loosen under repeated vibration. This guide presents a practical selection process based on verified fitment data and workshop experience. It examines thread diameter, pitch, seat design, shank length, strength grade, and corrosion resistance. These details matter. A bolt that looks right may still be unsafe.

Reliable decisions begin with the vehicle maker’s specifications, not marketplace photographs. Check the exact model year, axle position, wheel material, and approved torque range. Then compare markings, dimensions, and supplier test records before purchase. Use a calibrated torque wrench during installation, and inspect threads for dirt or deformation. Recheck the assembly when the manufacturer’s instructions require it. Rushed fitting remains a common weakness in real workshops. Technicians often see assumptions survive until vibration exposes them. Still, no checklist catches every unusual wheel conversion. That limitation deserves attention. When information conflicts, pause and consult an authorized dealer or qualified technician. By combining verified specifications, careful measurement, and honest uncertainty, drivers can choose Wheel Bolts with greater confidence in 2026.
How to Choose the Right Wheel Bolts in 2026?

Define Bolt Size, Seat Type, and Thread Pitch Using OEM Data

How to Choose the Right Wheel Bolts in 2026?

Define Bolt Size, Seat Type, and Thread Pitch Using OEM Data

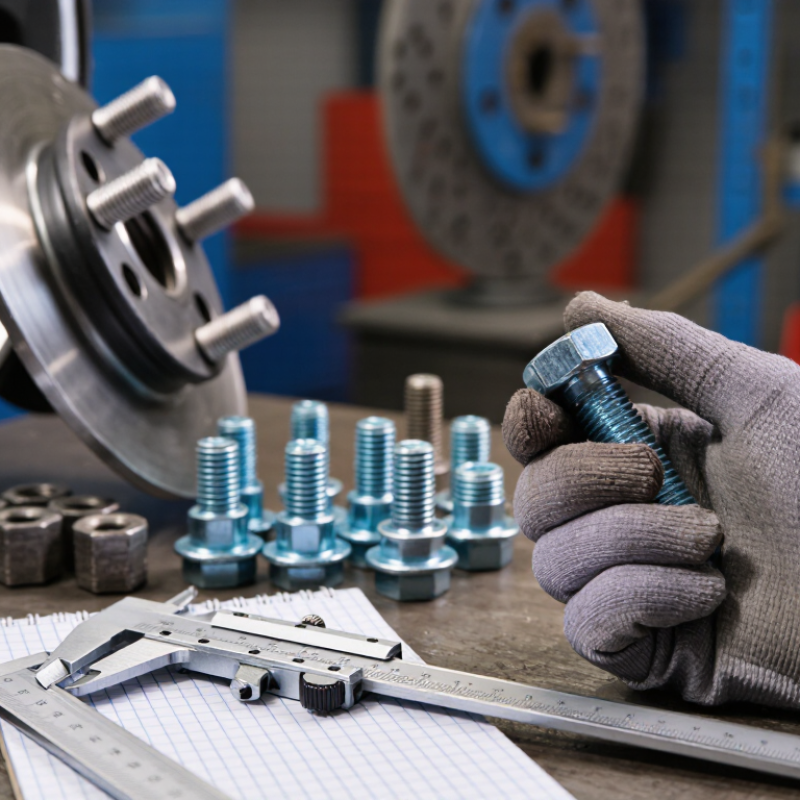
Choosing wheel bolts in 2026 starts with accurate OEM data, not guesswork. Wheel bolts are precision parts, not universal substitutes. Begin with the vehicle service manual, parts catalog, or an authorized repair record. Record the bolt diameter, overall length, and threaded length. Small errors matter. An oversized bolt may contact internal components, while insufficient thread engagement can weaken the connection.

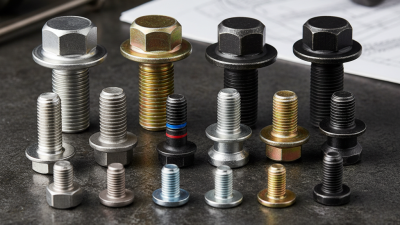
Thread pitch must match the original specification exactly. Measure it with a thread pitch gauge when the documentation seems unclear. Do not confuse a fine pitch with a similar-looking coarse pitch. The seat type also requires careful inspection. Conical, ball, and flat seats distribute clamping force differently. A bolt with the wrong seat may appear secure but fail to center the wheel correctly. Use a clear side profile and compare it with the OEM drawing.

OEM data should also confirm the required strength rating and approved bolt design. Check whether the wheel is original or an approved replacement, because mounting surfaces can differ. Tighten bolts with a calibrated torque wrench, following the specified sequence and value. After installation, rotate the wheel by hand and check for contact or resistance. I have seen fitment problems begin with a confident visual guess. Measurements can still be imperfect, especially with worn threads. Recheck every critical dimension before driving.
Compare ISO 898-1 Grades 10.9 and 12.9 by Tensile Strength

How to Choose the Right Wheel Bolts in 2026?

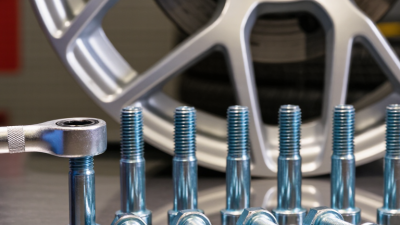
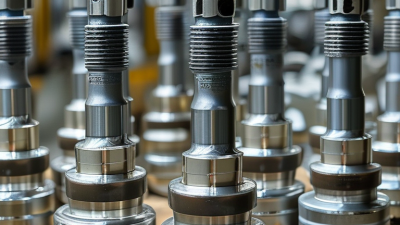
For wheel bolts, ISO 898-1 grades 10.9 and 12.9 show a clear strength difference. ISO 898-1:2013 lists a minimum tensile strength of 1,040 MPa for grade 10.9. Grade 12.9 reaches 1,220 MPa. That is roughly 17% higher. Their minimum proof stresses are 830 MPa and 970 MPa, respectively. Grade 12.9 also has slightly lower elongation, about 8% compared with 9% for grade 10.9. Stronger does not automatically mean safer.

A wheel bolt must match the wheel seat, thread pitch, shank length, and hub design. The 2024 ETRTO Standards Manual emphasizes correct wheel fastening geometry and load compatibility. SAE J2530 testing guidance also treats wheel fasteners as part of the complete wheel system, not isolated hardware. In practical fitting work, a 12.9 bolt can resist higher tensile loads, but excessive tightening may damage threads or distort the wheel seat. Torque matters.

Do not guess.

ISO 898-1 strength data cannot replace the vehicle maker’s torque specification. Corrosion, reused fasteners, and poor thread engagement can reduce real clamping performance. I would choose grade 12.9 only when the design permits it. Sometimes, grade 10.9 provides the better balance between strength, ductility, and service reliability. That judgment still needs checking against the actual wheel assembly.

Verify Hub Fit, Thread Engagement, and Wheel Load Ratings

How to Choose the Right Wheel Bolts in 2026?

Choosing wheel bolts starts at the hub, not the parts counter. Check the bolt pattern, thread diameter, and thread pitch with accurate tools. A bolt that looks close may still damage the hub. Confirm the correct seat shape, such as conical or ball-style. The seat must match the wheel pocket exactly. Never assume similar bolts are interchangeable.

Thread engagement deserves careful attention. Measure how far the bolt enters the hub after the wheel sits flush. Many applications need engagement close to the bolt’s diameter, but the vehicle and wheel specifications control the final requirement. Too little engagement can strip threads. Too much may contact internal hub components. Test the bolt by hand first. It should turn smoothly. Do not force it. I have seen rushed installations hide cross-threading beneath a tight torque reading.

Wheel load ratings matter more as vehicles become heavier. Electric vehicles, cargo equipment, and larger wheel assemblies can place greater forces on each corner. Compare the wheel’s rated load with the vehicle’s axle loads, then verify the bolt’s strength and approved torque range. Use a calibrated torque wrench on clean, dry threads unless the service instructions specify otherwise. Recheck torque after the initial driving period. A quiet inspection may reveal movement, uneven seating, or damaged threads before a serious failure develops.

How to Choose the Right Wheel Bolts in 2026?

Verify hub fit, thread engagement, and wheel load ratings before installation.

Verify hub fit

Match the bolt diameter and thread pitch to the vehicle hub. M12×1.25 and M12×1.5 are not interchangeable.

Check thread engagement

The bolt must achieve the vehicle manufacturer’s specified engagement without bottoming out in the hub.

Confirm wheel load rating

Select wheel bolts rated for the wheel and vehicle loads. Thread size alone does not determine load capacity.

Reference chart: common metric wheel-bolt thread configurations. Always confirm the exact specification, seat design, tightening torque, and load rating for the vehicle and wheel combination.

Set Installation Torque with OEM Tables and ISO 6789-Calibrated Tools

How to Choose the Right Wheel Bolts in 2026?

Choosing wheel bolts starts with fit, not appearance. Match thread diameter, pitch, seat shape, shank length, and strength grade with the vehicle’s OEM specification. A tapered seat cannot replace a ball seat. The wrong length may damage brake components or reduce thread engagement. The 2022 NHTSA Traffic Safety Facts report recorded 42,514 road deaths in the United States. That figure is not wheel-bolt specific, but it shows why small installation errors deserve disciplined control. I once trusted a familiar torque value. That was a mistake. Different wheels and threads can require different settings.

Use the OEM torque table for the exact vehicle, wheel, and bolt condition. Do not copy a value from another model. Clean, dry threads usually provide the intended friction. Lubrication can change the clamping force, even when the wrench displays the correct number. ISO 6789:2017 defines requirements for torque tools, including calibration and verification. Select a tool with traceable calibration records and check its condition before use. A click is not proof of accuracy. After installation, tighten bolts in a star pattern, lower the vehicle, and perform a final check at the specified torque.

Tips: Mark each completed bolt with a removable inspection line. Recheck after the vehicle maker’s stated distance. Record the date, torque setting, tool ID, and bolt condition. If the table is unclear, stop and request technical confirmation. Guessing feels efficient, but it leaves the most important detail unverified.

How to Choose the Right Wheel Bolts in 2026? - Set Installation Torque with OEM Tables and ISO 6789-Calibrated Tools

Wheel-bolt size and installation torque are vehicle-specific. Always confirm the required thread, seat design, bolt length, tightening sequence, and torque value in the applicable vehicle manufacturer service information. The dimensional references below are selection aids and must not replace the vehicle-specific specification.

Wheel Bolt Selection, Torque Control, and Verification Reference
Control Area Required Data or Dimension Valid Reference or Practical Check Installation Decision Typical Error to Avoid
Thread diameter M12, M14, or another metric nominal diameter specified for the vehicle Measure the bolt major diameter and compare it with the service specification. Do not identify a bolt by diameter alone. Use only the exact diameter specified for the hub and wheel assembly. Installing an M12 bolt where an M14 bolt is specified, or forcing a mismatched thread into the hub.
Thread pitch Common metric pitches include 1.25 mm and 1.50 mm, but the correct pitch is vehicle-specific Confirm pitch with a thread gauge or the approved parts specification. A similar-looking pitch can still damage the hub thread. The bolt must engage smoothly by hand for several turns before tightening. Cross-threading caused by using the correct diameter with the wrong pitch.
Bolt seat Conical, spherical, or flat-seat design, including the specified seat angle or washer arrangement Match the bolt seat to the wheel seat. The contact geometry controls centering and load transfer. The entire specified seat must contact the wheel evenly without rocking. Using a conical-seat bolt in a spherical-seat wheel, or omitting a required washer.
Usable thread engagement Enough engagement to meet the vehicle specification without bottoming out in the hub Check bolt length after the wheel is fully seated. The bolt must not contact the end of a blind hole or interfere with internal components. Confirm both minimum engagement and maximum permissible protrusion. Choosing a longer bolt because it appears stronger, causing bottoming or interference.
Fastener condition Undamaged threads, intact head and seat, no severe corrosion, deformation, or stretched appearance Clean dirt and loose corrosion from the mating surfaces. Replace fasteners that are damaged or identified as single-use by the vehicle documentation. Use clean, dry threads unless the service specification explicitly requires a lubricant or coating. Applying oil or anti-seize without adjusting the specified procedure; this can change achieved clamp load.
OEM torque value Vehicle-specific value, normally stated in N·m, together with any tightening condition Use the latest applicable vehicle service table. Check whether the value applies to dry or lubricated threads, new or reused fasteners, and a particular wheel type. Set the tool to the exact OEM target; never substitute a generic torque value solely from thread size. Using a universal M12, M14, or M16 torque chart as the final installation specification.
Torque tool capacity Tool working range must include the OEM target without operating at the extreme end of the scale Select a calibrated hand torque tool whose stated operating range covers the target value and whose resolution supports the required setting. Record the tool identification, calibration status, target torque, and date of use. Using a tool below its rated range, or relying on an impact tool as the final torque-control device.
Calibration basis ISO 6789 applies to hand torque tools and includes requirements for calibration and conformance testing Use a calibration certificate or verification record traceable to suitable measurement standards. Check the certificate scope and measurement points. Use a tool within its stated calibration validity and operating conditions. Assuming that a recent-looking sticker alone proves accuracy at the required torque.
Tightening method Wheel fitted flush; bolts started by hand; star or crisscross sequence unless the service information states otherwise Keep the wheel supported and rotate the fastener smoothly. Avoid side loading the torque tool and keep the handle at the intended grip point. Perform the final pass with the calibrated torque tool, not with an impact wrench. Fully tightening one bolt before the others, or using an extension that changes the effective torque without correction.
Post-installation check Recheck procedure and interval specified by the vehicle documentation Where required, verify torque after the vehicle has been driven for the specified distance or after the first operating cycle. Do not loosen and retighten automatically unless instructed. Document the final check and investigate any fastener that turns significantly before reaching the target. Rechecking with an uncalibrated tool or treating a moving fastener as proof that the original torque was correct.

Torque is a control of the tightening process, not a direct measurement of clamping force. Surface condition, lubrication, coatings, friction, bolt reuse, wheel seating, and tool technique can materially affect the final clamp load.

Check Corrosion, Fatigue, and Safety Compliance Under SAE J429 Standards

How to Choose the Right Wheel Bolts in 2026?

Check Corrosion, Fatigue, and Safety Compliance Under SAE J429 Standards

Choosing wheel bolts in 2026 requires more than matching thread size. Start with the wheel drawing, vehicle load data, thread pitch, seat shape, and required clamping force. A bolt may fit physically yet fail because its grip length is wrong. Check SAE J429 grade markings, dimensional records, and material certificates from a traceable source. SAE J429 defines mechanical requirements for many inch-series fasteners, but it is not a complete wheel application standard. That distinction matters.

Inspect under the head, around the flange, and inside thread roots. Look for red rust, dark pitting, coating blisters, or a narrowed thread crest. Salt, water, and trapped dirt can begin damage where a quick glance misses it. Fatigue may develop after repeated over-torque, under-torque, impact loading, or poor seating. Use a calibrated torque wrench and follow the vehicle maker’s tightening sequence. Do not assume a bolt is safe because it feels tight. That is an easy mistake. Replace bolts showing cracks, stretching, severe corrosion, damaged threads, or uncertain history.

For safety compliance, compare the bolt’s grade, hardness, tensile strength, proof load, coating, and dimensions with the engineering specification. Request test reports, lot identification, and coating information, not only a sales description. Check thread engagement and wheel-to-hub contact before final torque. After installation, inspect for movement, fretting marks, or torque loss during scheduled maintenance. Documentation can be incomplete. Pause and verify. An honest review should admit that visual inspection cannot measure hidden fatigue.